Showing posts with label summer. Show all posts

Wednesday, September 4, 2013

Eggplant Pizza

     My Grandma's garden is in overdrive and the backup plants she planted in my yard are producing tomatoes faster than I can pick them.  The toppling bowl of tomatoes on my counter is a constant reminder that I need to do something all the vegetables.  I know in a few months I will be yearning for a garden fresh tomato so I'm trying to make the best of the surplus before it goes bad!  In addition to the tomatoes, it has also been a good year for eggplant-one of my favorites.  I Pinned this recipe for eggplant pizzas about a week ago and it was as if my Grandma had been on Pinterest (she's never used a computer in her life) because the very next day there was a perfect little eggplant in my almost daily garden gift.  No school tomorrow means Wren and I are pretending it's summer vacation again and we have all the time in the world to cook up new recipes that take longer than 10 minutes and then blog about it.

Eggplant Pizza
Recipe Adapted From kaylynskitchen.com*

Ingredients
1 medium eggplant sliced into 3/4 inch pieces
olive oil
garlic, minced
1 can of tomatoes or a few fresh ones, diced
oregano
salt
shredded mozzarella

Method
Preheat oven to 375 degrees.
1. Place the slices of eggplant on a doubled piece of paper towel.  Sprinkle with salt and allow to sit for 30 minutes so that the excess water is absorbed by the paper towel.
2. While the eggplant is resting, heat some olive oil in a skillet over medium heat.  Add the garlic, tomatoes, and oregano.  Allow to simmer until it is sauce like.  Add a tablespoon of water any time things start looking too dry.
3. After the eggplant has had time to dry out, blot the excess moisture using a paper towel, while at the same time brushing off excess salt.  Place on a greased baking sheet and roast for 25 minutes.
4. When the eggplant is roasted, top each slice with a spoonful of the tomato sauce.  Then top with a generous amount of cheese.
5. Broil until the cheese is melted.

Wren and Grandma checking out our tomato plants.


*If you want a more exact recipe, check out the link above.  Between making sure Wren wasn't eating dog food and she wasn't feeding the dogs her own dinner, I stole quick glances at the recipes and just kept my fingers crossed for something edible.

Monday, August 19, 2013

Quick Broiled Salmon with Veggies

     The September 2013 issue of Cooking Light came right in time for some much needed inspiration!  I've been thinking a lot about making dinners once I go back to work-not always wanting to make the same thing mostly to expose Wren to a lot of different things.  When she was eating purees, it was easy to take something out of the freezer and vary her meals up.  Now that she is more aware of what she wants to eat and prefers "real" food, I have to be a little more creative.  Arnauld picked out this recipe for broiled salmon.  Wren has had salmon in the past and really liked it.  Unfortunately, this go around she wouldn't even put it in her mouth.  I don't get it!  We have some leftover, so I suppose I will try again tonight. 
     Arnauld and I enjoyed the meal- although I did not even attempt a pepper... one food that I just don't like at all.  The veggies were on the crispier side, almost raw.  Arnauld suggests sauteing them a bit before broiling if you want them a little more well done.  Start to finish, this dish only took 15 minutes.  You could definitely play around with the veggie selection.  The sauce really made the dish.

Quick Broiled Salmon with Veggies

Ingredients
1-2 lbs salmon fillets
3/8 tsp salt, divided
1/2 tsp ground pepper, divided
1 red bell peppers, sliced
1 cup onion, vertically sliced
1 cup snow peas
2 tbsp rice vinegar, divided
2 tbsp soy sauce
1 1/2 tbsp honey
1 tbsp water
2 tsp olive oil
2 tsp chili paste
1/2 tsp cornstarch (I didn't use this and the sauce was just fine)
3 garlic cloves, sliced
2 1/2 inch pieces of fresh ginger

Method
Preheat broiler to high.
1. Place a rimmed baking sheet in the oven to preheat for 5 minutes.
2. Sprinkle both sides of the salmon, evenly, with salt and pepper.  Arrange on the pan, skin side down.  Broil for 5 minutes.
3. Combine the remaining salt and pepper, bell peppers, onion, snow peas, and one tablespoon of rice vinegar.  Arrange the vegetables on the pan with the fish.  Broil for 3 minutes.
4. Combine the rest of the rice vinegar, soy sauce, and remaining ingredients in a microwave safe bowl.  Microwave on high for 2 minutes.  Allow the sauce to rest for 5 minutes before removing the ginger.  Serve with the fish and vegetables.

Tuesday, August 13, 2013

Strawberry Shortcake

     Even though we celebrated Wren's birthday a few days early, we had to do something to mark the actual day that she was born!  We had a much smaller celebration where we watched a slideshow of pictures from the last year and ate homemade strawberry shortcake.  Since the weekend, I think Wren has consumed more sugar than she did in her whole life combined.  I wanted this last birthday "cake" to be a treat but still a little healthier.  This recipe was a perfect choice-summer deliciousness!

Strawberry Shortcake
Recipe from Small Kitchen Chronicles

Fruit
8 cups strawberries, cut
 5 tbsp light brown sugar
1 tsp lemon zest

Shortcakes
3/4 cup reduced fat buttermilk + 2 tablespoons for over cakes before baking
1 egg
1 3/4 cup flour
1/4 cup corn meal
1 tbsp baking powder
 1/2 tsp baking soda
3 tbsp light brown sugar
1/2 tsp sea salt
1 stick of butter, chilled

Whipped Cream
1 half pint heavy cream, chilled
1 tbsp confectioners’ sugar
1 tsp vanilla extract
 
Method
Preheat oven to 425 degrees.
1. Adjust the baking rack to the second to bottom position.  Cover a baking sheet with parchment paper.
2.  Mash 3 cups of strawberries, in a large bowl, using a potato masher. Stir in the remaining strawberries, 2 tablespoons of light brown sugar,  and the lemon zest.  Cover and refrigerate.
3. In a small bowl, whisk together the 3/4 cup of buttermilk and the egg.  Set aside.
4. Use the food processor to pulse together the flour, corn meal, baking powder, baking soda, brown sugar, and salt.  Slice in the butter.  Pulse again until the mixture is crumbly. 
5. Combine the dry ingredients with the buttermilk and egg in a new larger bowl.  Use a clean spatula to fold together-do not over work the dough.
6. Transfer the dough to a lightly floured surface.  Knead the the dough until it comes together.  Create a large circle that is about 3/4 to an inch thick.  Use a floured 3 inch biscuit cutter to cut as many cakes as you can.  You should be able to make 7-8.
7. Place the cakes on the baking sheet, about 2 inches apart.  Use a baking brush to brush on the remaining buttermilk.
8. Bake for 15-17 minutes, or until golden.  Rotate the baking sheet halfway through the baking process.
9. While the cakes are baking, combine the whipping cream, vanilla, and sugar in a bowl.  Use a hand mixer on medium speed to beat the mixture until soft peaks form.  Cover and place cream in the refrigerator.
10. To assemble the cakes, use a knife to cut the shortcakes in half.  Spoon on a layer of strawberries followed by a layer of whipped cream.  Add the top of the cake and garnish with a bit of cream and a strawberry.

A look back at our year...


Monday, August 5, 2013

When Life Hands You Blueberries...

     Before church yesterday, I made blueberry pancakes, that I blogged about yesterday, as well as a blueberry cake and blueberry muffins for Wren.  It was amazing what the gift of a quart of blueberries can do to inspire you!  The cake was for a going away dinner for Arnauld's brother, Weethne's, girlfriend Molly (that's a mouthful!).  She is going away to vet school at Davis in California.  We couldn't be prouder of her!  I used applesauce in place of the oil, which may have made the cake a little drier than I hoped.  It ended up tasting like a blueberry muffin in cake form.  I'm just starting to play with using healthier substitutes like applesauce and yogurt.  I'll have to keep mucking about.

Blueberry Lemon Cake 
Recipe Adapted from A Quiet Life Blog (a very pretty blog!)

Ingredients
Cake
2 1/2 cups flour
1 cup sugar
1 tsp baking powder
1 tsp baking soda
3/4 tsp salt
1 cup yogurt
3 tbsp canola oil (this is where I used the same amount of applesauce)
2 tsp grated lemon peel
2 tbsp lemon juice
1 egg
1 1/2 cups fresh or frozen blueberries
1/3 cup sliced almonds

Glaze
1/2 cup powdered sugar
2 to 2 1/2 tsp milk
1/4 tsp vanilla

Method
Preheat oven to 375 degrees.
1. Prepare a 9 inch springform pan or 9 inch square pan by spraying or greasing.
2. In a bowl, mix the flour, sugar, baking powder, baking soda, and salt.
3. In a separate bowl, combine the yogurt, oil/applesauce, lemon peel, lemon juice, and egg using a whisk.
4. Combine the wet and dry ingredients before transferring to your prepared pan. Spread the batter so that it is even and then sprinkle with almonds.
5. Bake for 35-40 minutes or until a toothpick inserted into the center of the cake comes out clean.
6. Mix the glaze by combining all of the ingredients until smooth.  It should be thin enough to drizzle over the cake while it is still warm.

Blueberry Muffins
Recipe Adapted from Two Coast Table


Ingredients
2 1/4 cup flour
2 tsp baking powder
1/2 tsp salt
1/2 tsp ground cinnamon
2 large ripe bananas, mashed
2 eggs
2/3 cup brown sugar, firmly packed
1/2 cup butter, melted
1 tbsp vanilla
1 tbsp lemon juice
1 cup blueberries
2 tbsp grated lemon rind
3 tbsp sugar

Method
Preheat oven to 375 degrees.
1. Prepare muffin tin by spraying or lining with paper cups.
2. Combine flour, baking powder, salt, cinnamon, and 1 tablespoon of lemon rind.
3.  Beat together the bananas, eggs, brown sugar, butter, vanilla, and lemon juice.
4. Combine the wet and dry ingredients and then fold in the blueberries.
5. Fill the muffin tin until almost full.
6. In a small bowl combine the remaining lemon rind and sugar.  Sprinkle the tops of each muffin with this mixture.
7. Bake for 25-30 minutes or until golden.


Sunday, August 4, 2013

Single Pancake Recipe

     Yesterday we came home from running errands to find a quart of freshly picked blueberries sitting on our counter.  They were a gift from my parents, sister, and nephews who spent the afternoon at Jones' Farm.  I knew when I woke up this morning that I wanted to use them to make Wren a special breakfast.  I had pinned a recipe for blueberry and lemon muffins, since she is a mini muffin fiend.  However, Wren quickly let me know that there would be no time for muffins this morning.  Plan B...blueberry pancakes.  I didn't want to make a huge stack of pancakes, but I wondered, "Does anyone ever make just one?"  Of course they do.  I found the perfect recipe that I was able to adapt to make a delicious breakfast for Wren.  Well, I can't say for certain that they are delicious.  I never had the chance to try them because Wren was gobbling them down faster than I could cut them.  We'll just have to take her word for it.

Single Pancake
Recipe Adapted From joythebaker.com

Ingredients
1/3 cup flour (I used whole wheat)
1 tbsp oats (Quick or regular)
2 tsp sugar
1/2 tsp baking powder
1/4 tsp baking soda
pinch of salt
1 tbsp melted butter
1/4 cup plus 2 tsp milk (I used buttermilk)
dash of vanilla
handful of blueberries or whatever other pancake fixings you have on hand

Method
1. Mix together the flour, oats, sugar, baking powder, baking soda, and salt.
2. In a separate bowl, combine the butter, milk, and vanilla.
3. Combine the wet and dry ingredients.  Fold in the blueberries.
4. Heat a skillet with a bit of oil.  Spread the pancake batter, either all at once for a large pancake or in smaller amounts for more pancakes.  Cook until bubbles form, then flip.  Cook until golden.


Monday, July 29, 2013

Lentil Burgers with Mint-Yogurt Sauce

     Our first family vacation to Maine was a success and now we are home enjoying summer.  Driving home I spent some time on Pinterest reading about good recipes for toddlers.  It's hard to believe our little girl will be turning one in just a couple of weeks!  I have already begun to think about what I will pack her for breakfast and lunch once I go back to school at the end of August.  She hasn't had any purees since  school ended in June.  She prefers to eat whatever we are eating or leftovers from the fridge.  Wren's meals usually consist of a lot of random things-something that may not be as easy to pull off in her lunchbox.  I pulled out my Cooking for Baby book again tonight to try and get inspired.  I had all of the ingredients for these lentil burgers so I gave them a try.  I thought they were good-Wren had her own opinions.  The burgers had a lot of flavor and they stuck together better than most veggies burgers I have attempted.  I also thought the yogurt dipping sauce would be a selling point for Wren-I read that toddlers like to dip.  Apparently, she is not a fan of dipping-maybe because she isn't technically a toddler yet.  She has this great new move where she uses her tongue to slowing spit things out and then uses her hands to swipe everything to the floor where our dogs are always waiting.  Luckily this recipe made six burgers so we will try again tomorrow!

Lentil Burgers with Mint-Yogurt Sauce

Ingredients
3/4 cup lentils
1/2 cup old fashion oats
1 tsp curry powder
1 tsp cumin
1 egg
salt and pepper
1 cup plain yogurt
2/3 fresh mint, minced
1 tbsp cooking oil (I used coconut)
Not happy about lentil burgers for dinner...

Method
1. Put lentils and 2 cups of water in a saucepan over medium-high heat.  Boil and then reduce to a simmer and cover.  Cook until tender- about 15 minutes.
2. Use a food processor to grind oats to a coarse meal.
3. In a large bowl, use a potato masher or fork to mash the lentils.  Stir in 3 tablespoons of the oats,the cumin and curry.  Add the egg, salt, and pepper and stir. 
4. Use your hands to form burgers approximately 4 inches wide and 1/2 inch thick.  Coat each burger with the remaining oats.
5. Place the burgers, uncovered, in the fridge for about 10 minutes.
6. When ready to cook, heat the oil in a skillet over medium-high heat.  Add the burgers and cook for 3-4 minutes per side.  They should be brown and crispy.
7. Prepare the dipping sauce by stirring the mint into the yogurt.

Some of my vacation favorites:


Friday, July 19, 2013

Bulgur and Peach Salad

     This recipe was one that I pulled from the August issue of Cooking Light.  I just happened to have all of the ingredients on hand, with the exception of hazelnuts that I just omitted.  I'm hoping that the addition of fruit and strong flavors will entice my brand new picky eater.  Life was simpler when she ate everything!

Bulgur with Peaches and Mint

Ingredients
2 cups water
1 cup uncooked bulgur
2 tbsp champagne vinegar (I used apple cider vinegar)
2 tbsp extra virgin olive oil
2 tsp brown sugar
1/4 tsp salt
1/4 tsp pepper
1 cup diced peaches
1/4 cup fresh mint leaves

*The recipe also called for 2 1/2 oz of toasted hazelnuts

Method
1. Bring the bulgur to a boil in a small saucepan.  Cover and simmer for 10-12 minutes and then let sit for 5 minutes.  Drain and rinse with cold water.
2. Combine the vinegar, olive oil, sugar, salt, and pepper.  Whisk together until the sugar dissolves.  Add the bulgur, peaches, and mint.  Toss together and serve.


Vacation Baby Muffins

     A friend sent me this recipe after I posted my first muffin recipe that I tested out for Wren.  We are leaving for Maine in the morning so I figured why not fire up the oven so we can have a tasty snack for the road-the temperature in our house is only 89 degrees!  Needless to say, I worked up a greater sweat baking than I do kickboxing.  As soon as Wren saw them on the counter she began clicking her tongue, her signal that she is hungry.  I cut her off at three mini muffins. 

Carrot, Apple, Coconut Muffins

Ingredients
1 1/2 cup whole wheat flour
1 tsp baking powder
1/2 tsp baking soda
1/2 tsp salt
1/2 cup unsweetened coconut flakes
2 carrots, peeled and grated (about 1 cup)
1 apple, peeled and grated (about 1/2 cup)
2 eggs
1 tsp vanilla
1/3 cup milk
1/4 cup unsweetened apple sauce
1/2 cup honey

Method
Preheat oven 350 degrees
1. Combine first seven ingredients in a large bowl.
2. Combine the rest of the ingredients in a separate bowl. 
3. Stir the dry ingredients with the wet.
4. Prepare a mini muffin tin by placing liners or spraying with cooking spray.  Fill each with one tablespoon of batter.
5. Bake for 15 minutes.


Sunday, July 7, 2013

Zucchini Quinoa

     Wren is getting picky with her eating.  She knows what she likes and very clearly what she doesn't.  She has a stubborn streak, just like her dad!  I'm trying to keep up with giving her a lot of variety while incorporating some of the fruits and veggies that are in season.  I consulted a baby food book today for some ideas and came up with this quinoa dish.  Hopefully it doesn't end up on the floor or in our dogs' bellies.

Zucchini Quinoa
 Ingredients
1/2 cup quinoa
1 1/2 cup vegetable broth or water
1-2 medium zucchini or summer squash grated
2 tbsp olive oil
1/2 tsp cumin

Method
1. Heat a medium sauecpan over medium high heat.  Add the quinoa and one tablespoon of olive oil.  Stir to coat the quinoa.  Add the broth and bring to a boil.
2. Reduce the heat and cover the pan.  Simmer for 20 minutes.
3. Meanwhile, add the remaining olive oil to a skillet.  Heat over medium high heat.  Add the zucchini and cumin to the pan and cook for 3-5 minutes.
4. When the quinoa is done, combine with the zucchini and serve.

Picnic Desserts

     Summer is in full swing and I couldn't be happier.  The 4th of July weekend is coming to a close and it was jam packed with sunshine, picnics, family, and a lot of sweat thanks to a lovely heatwave.  What's a better heatwave activity than turning the oven on to do some baking?  That's just what I did, which sent the temperature in our house soaring to 88 degrees.  Luckily my desserts were well received.

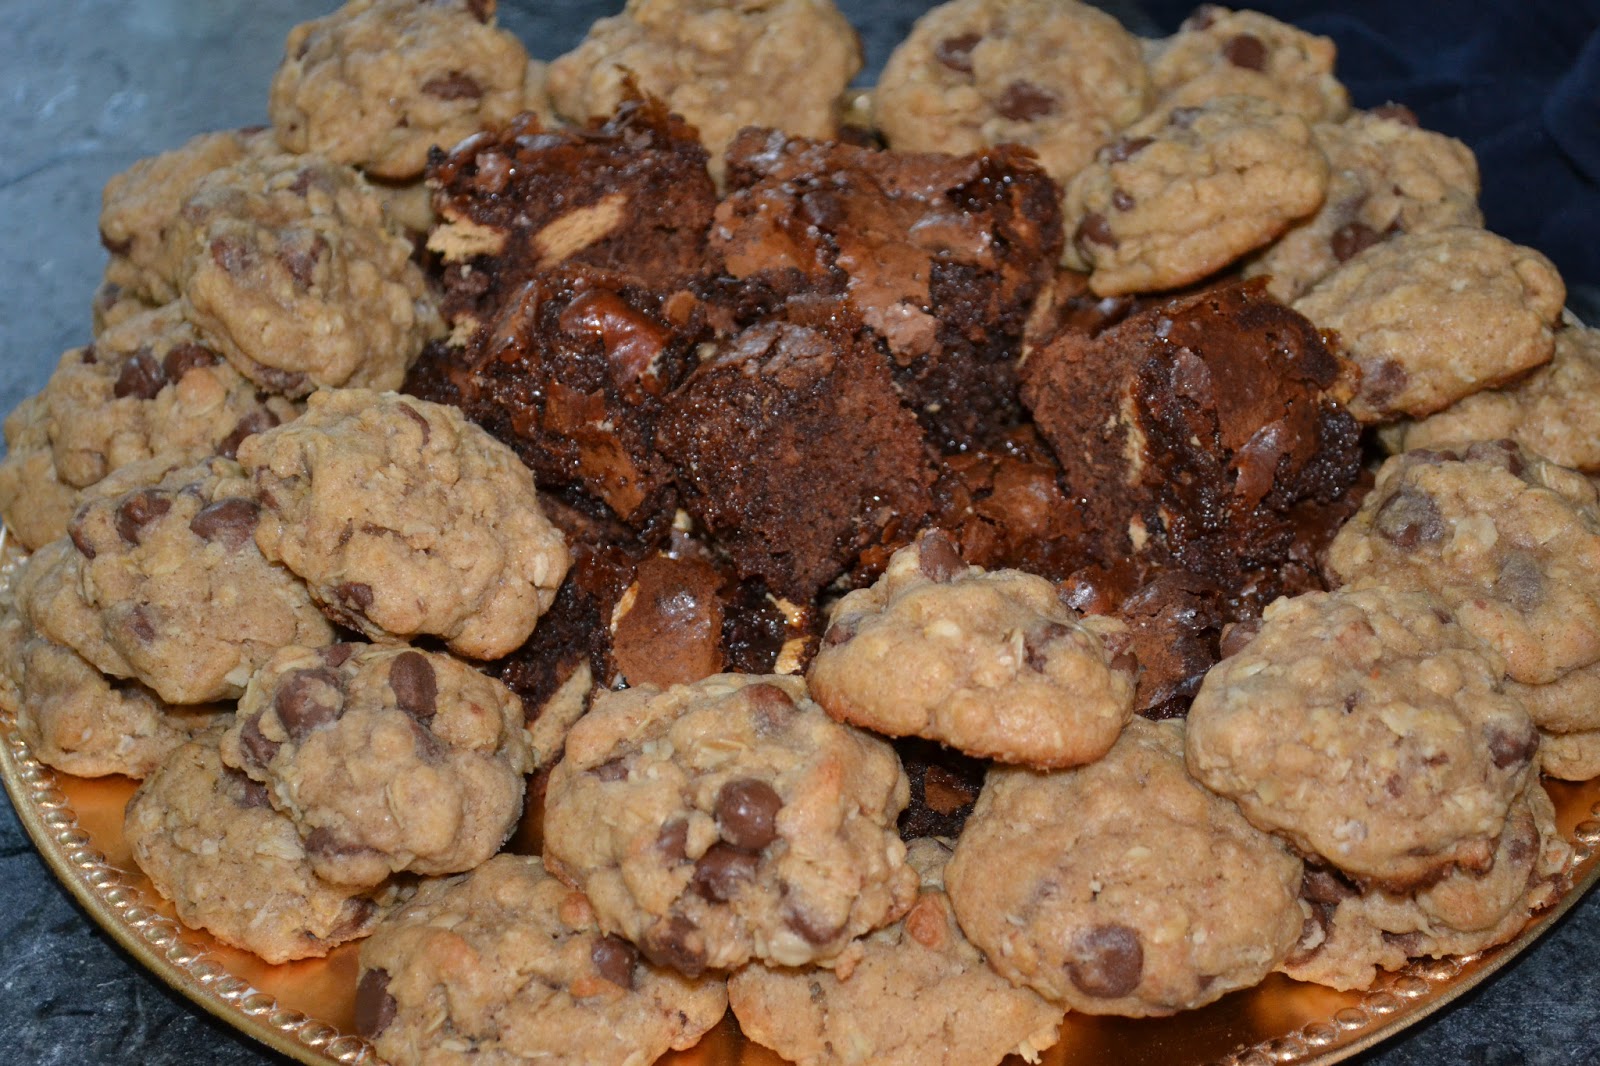
S'mores Brownies
The cookies pictured here are a recipe I've made before, Brown Butter Chocolate Chip Cookies.

Ingredients
2/3 Cup Flour
1/2 tsp Salt
1/2 tsp Baking Powder
1/4 Cup Unsweetened Cocoa Powder
1/2 tsp Cinnamon
1/4 Cup Semisweet Chocolate Chips
10 tbsp Unsalted Butter
1 1/4 Cup Sugar
2 tsp Vanilla
3 Eggs
9 Graham Crackers (enough to make a solid layer)
Enough marshmallows to make a single layer
1-2 Cups chocolate chips
Cooking Spray

Method
Preheat oven to 325.
1. Prepare an 8x8 baking pan by putting down a layer of parchment paper and then coat it with cooking spray.Leave extra paper on the sides to help you pull the brownies from the pan.
2. Mis the flour, salt, and baking powder together in a small bowl and set aside.
3. Melt the semisweet chocolate chips, with the butter, cinnamon, and cocoa powder.  Stir until smooth.  Then remove from heat and whisk in the sugar and vanilla.  Next use the whisk to incorporate one egg at a time.
4. Add the dry ingredients to the bowl and stir just enough to incorporate everything together.
5. Pour about 1/3 of the batter into the prepared brownie pan.  Next lay a layer of graham crackers on top.  Follow the graham cracker layer with a layer of chocolate chips and then a layer of marshmallows.  Pour the remaining batter on top.
6. Bake for 40-50 minutes or until a toothpick comes out sort of clean.  The marshmallow layer will make the brownies bubbly so be careful not to over bake.
7. Cool for 10 minutes before removing the brownies from the pan using the extra parchment paper.  Let rest for 2 hours before attempting to cut...they are very gooey!

Chocolate Peanut Butter Truffles

Ingredients
1 cup semisweet chocolate chips
1 cup smooth peanut butter
1 package of cream cheese

Method
1. In a medium saucepan, melt the chocolate and peanut butter together.  Stir until smooth.
2. Stir in the cream cheese and mix until smooth.
3. Put the saucepan in the fridge to chill.
4. Roll the chocolate mixture into 1 1/2 inch spheres.  You can get fancy by then rolling them in lots of different toppings such as cocoa powder, powdered sugar, chopped nuts, or sprinkles.